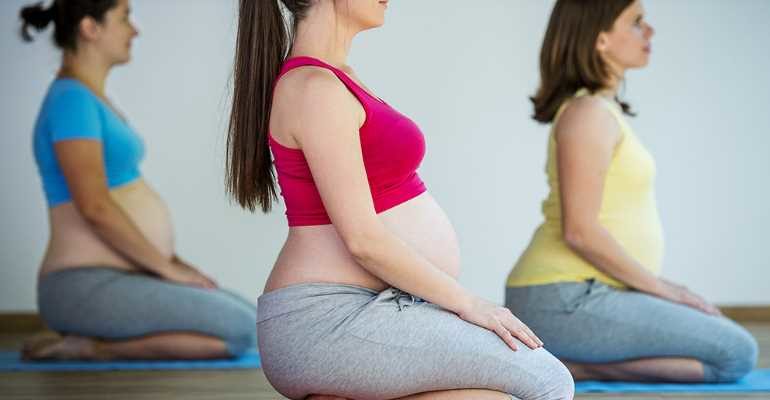
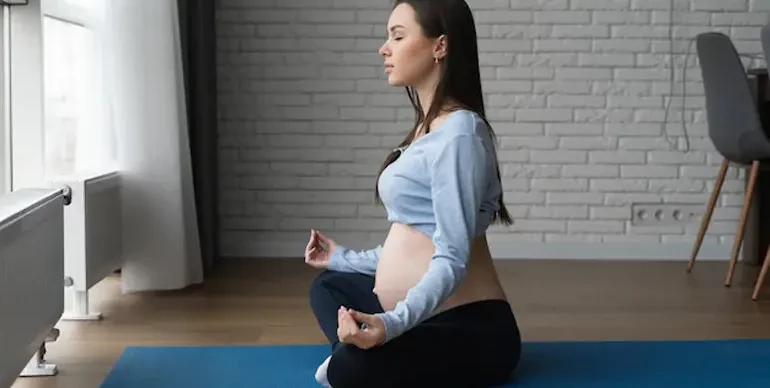
The second trimester of pregnancy is a period of time when intense hormone starts to lessen and a woman starts feeling more in balance. Because of this, she may start to experience an upward surge in energy and confidence. This is the time that a woman can really start to enjoy her pregnancy 🙂 Your body and mind are more stable and it is a great time to build strength and stamina in your body. A lot of women are well advised to start doing proper prenatal yoga practice from the second trimester onwards.
Remember that the poses shown below are to be practised on your own only if you are an intermediate or advanced yoga practitioner. Please do not try these poses if you have never done yoga before. It is better to attend a pregnancy yoga class in your side of town or better still – hire a prenatal yoga instructor who can come home thrice a week and help you out with your pregnancy yoga practice. Always do a few rounds of Surya Namaskar to get your body well warmed up before practise and then take the time to practise relaxation poses after your session to relax and unwind. Do remember though that the second trimester may be a time when your energy levels have increased but it is still important to rest whenever you feel tired.
Warrior Pose 2
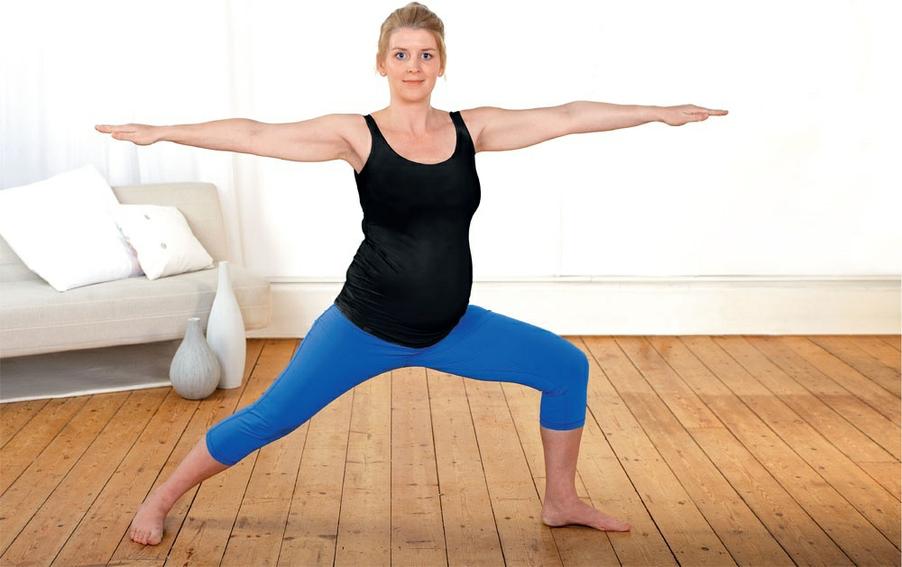
The Warrior Poses in Yoga helps to build strength, confidence and stamina. They may be tough to perform if you have never done Yoga before.
- Start from a strong wide-legged posture with your feet parallel to each other. Put your hands on your hips and inhale and stretch your spine upwards.
- Point your left foot to the side and move your right foot outwards to widen the stance. Keep your hips facing forward and your shoulders down.
- Exhale and bend your left knee and lower your hips.
Inhale and raise both arms to shoulder height position and keep your fingers extended. Look straight ahead or towards your left arm. Hold for three breaths, then release. Repeat on the other side.
Triangle Pose
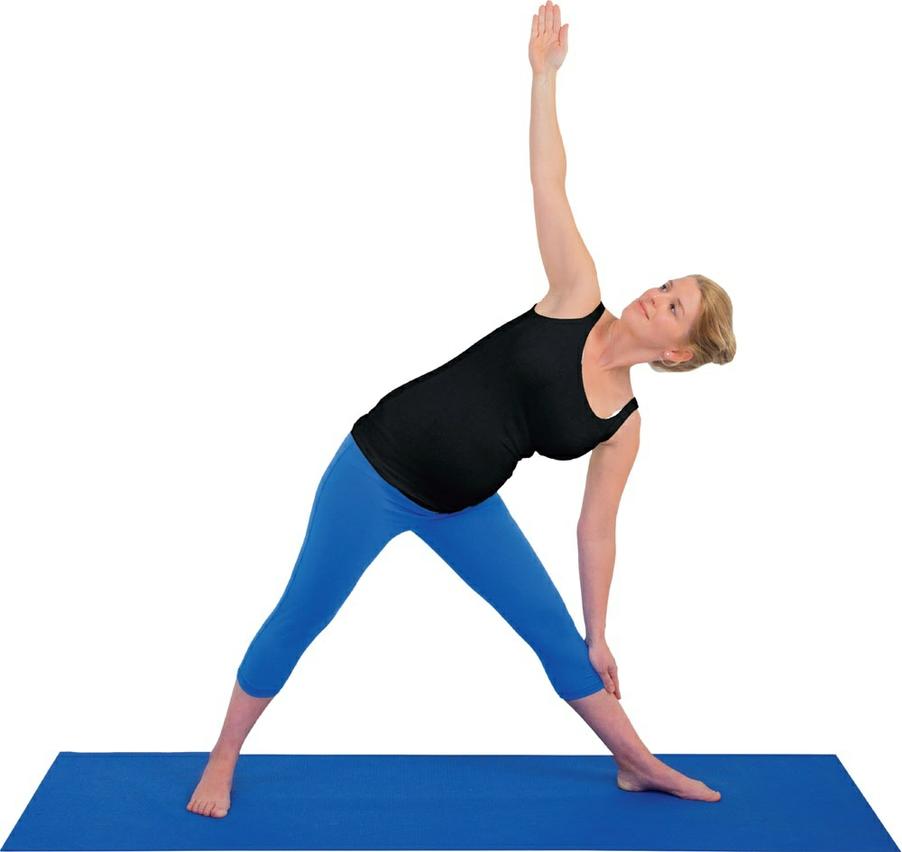
The Triangle Pose is a classic yoga pose that helps in stretching your spine, inner thighs, abs and side muscles. It also opens up your pelvic joints. But the idea is to practise this pose slowly and with mindfulness. As your baby bump gets bigger, the Triangle Pose will help you to create space and openness in your body.
- Stand with your legs about 3 feet apart with feet point forwards and your hands placed upon your hips. After this turn your left foot to the side and push your hips forward gently but keeping your spine erect.
- Inhale and lift both arms to shoulder height position. When you exhale, bend your body to the left and place your left hand on your left shin or higher up if you dont feel comfortable. Inhale and bring your right hand to rest on your lower back, pull your shoulders back and open and rotate your chest.
- Once both shoulders are on a same line and if you feel stable then inhale and raise your right hand up and point it upwards. Hold for as long as you feel comfortable and then come back out of the pose slowly in reverse.
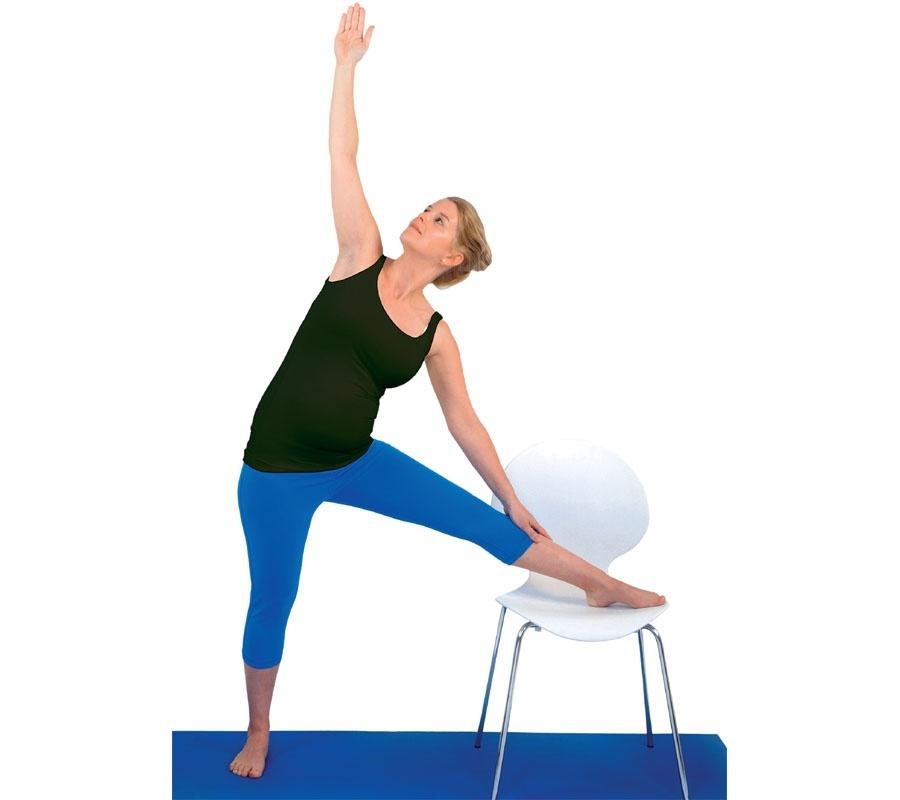
Repeat the instructions on the other side. If you are not able to do this pose, you can also practise this pose in a supported version with the help of a chair as shown below.
Tree Pose
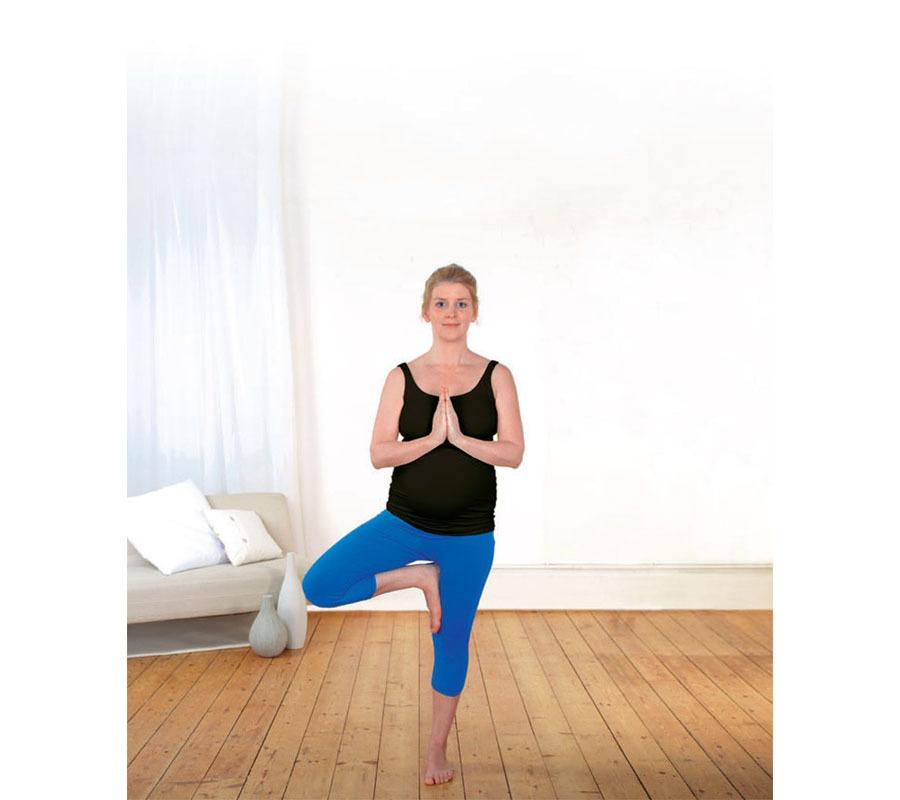
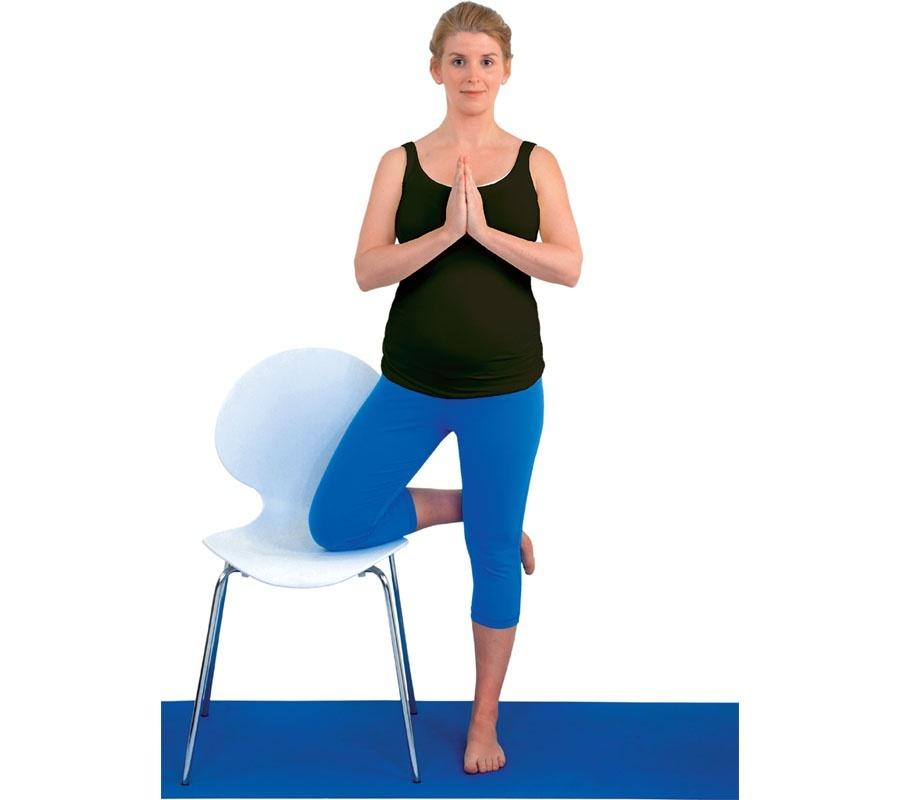
The Tree Pose is a balancing posture and requires excellent alignment. It offers numerous benefits like increased grounding, stability and centering. If your ankles and feet feel weak, then do the supported version shown with the chair.
- Stand tall and erect and feel strong. Keep your feet hip length apart and your parallel to each other.
- Inhale, lift your right foot and place the sole against the inner left thigh and ensure that your right knee is pointing outwards.
- Bring your hands in Namaskar position, relax your eyes and look ahead at a single spot and balance yourself. Hold the pose for a few breaths.
Repeat this on the other side.
Check the image below and perform this pose by balancing against a chair.
Wide Squat
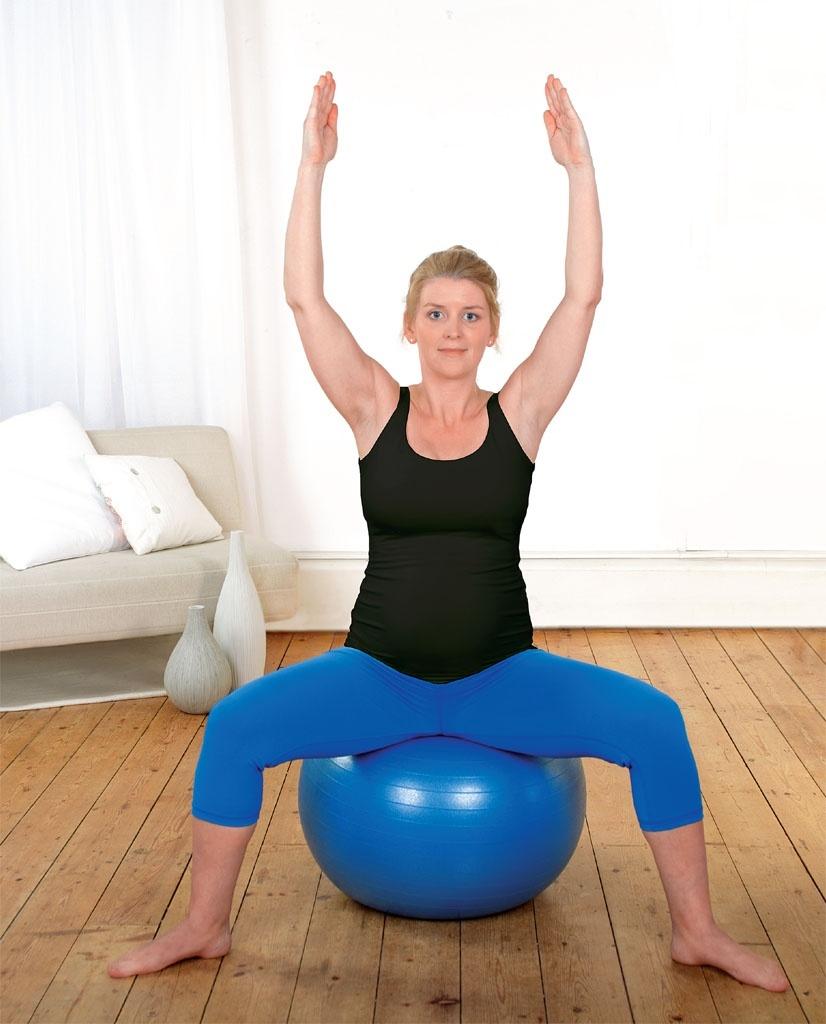
A squat helps to build strength and stamina in the lower body. Because of this, it is a great pose that will prepare you for labour. When your body feels strong, your mind relaxes and the birthing process takes place naturally. Do remember that when you do squats, you have to breathe deeply and focus on centering your body and connecting to your inner self. Depending on your ability and current strength, you can do a squat sitting on the edge of a chair or exercise ball, against a wall or freestanding. But always remember to ensure that your joints are aligned and you maintain strong poise and balance.
- Sit on the edge of a chair or a ball with your legs wide, feet flat on the floor and toes pointed diagonally outwards. Alternatively stand in a wide-legged stance and bend your legs as low as possible. Keep your back erect and ensure that your knees are above your heels and your feet point in the same direction.
- Inhale and stretch both your arms above your head and then exhale and bring both your arms slowly down until you touch the floor in front of you.
- Repeat this movement a few times moving slowly and steadily.
Note: Do not practise this pose if you are suffering from SPD or low-lying placenta.
Wide Leg Bending
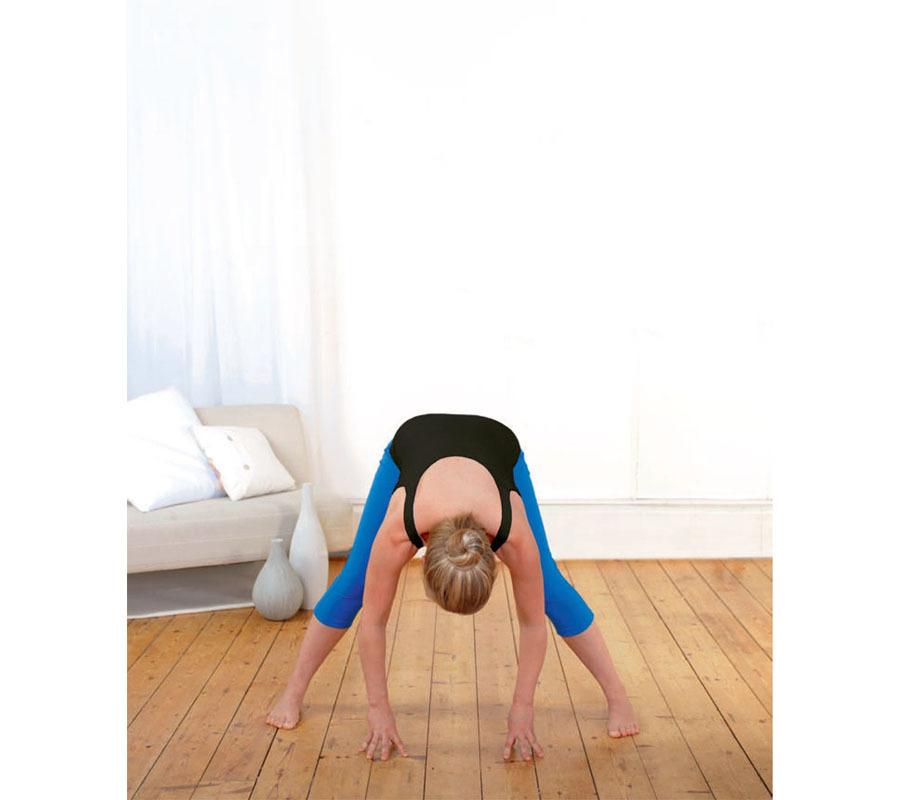
Forward Bending will help you to lengthen your spine, slow your heart, help free your sinuses and relax your mind.
- Stand with your feet about 3 feet apart and keep your hands on your hips. Inhale and raise both your hands upwards and lengthen your spine.
- Exhale and bring your hands back on your thighs and bend your knees and try to place your hands on the floor.
- Gently spread your legs further apart until you can feel a stretch between your legs. Hold for a few comfortable breaths.
- With the weight still resting on your hands, walk your feet inwards, bend your knees, place one hand after another on your thighs and bring your body back to an upright position.
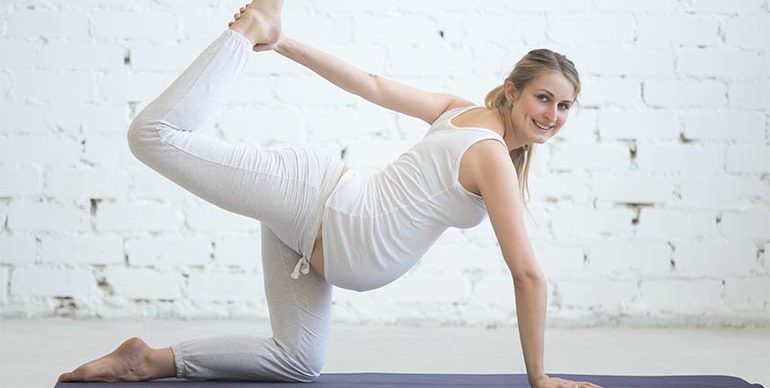
Arm and Leg Extension
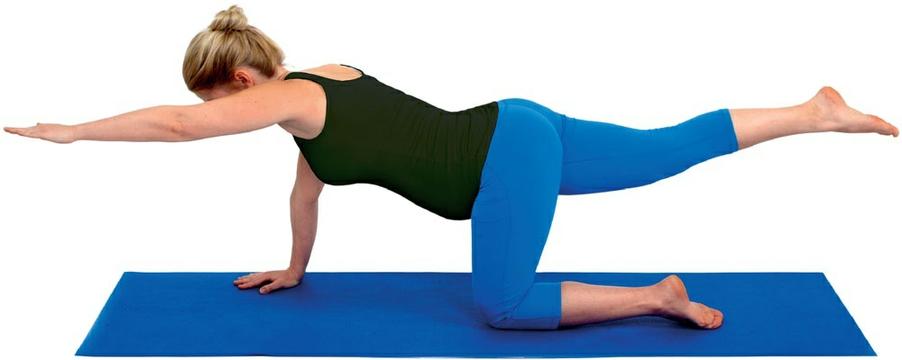
This pose is an excellent way to improve your balance as well as get a decent stretch. Your growing baby also receives more room whenever you are on all fours.
- Come into a tabletop position on all fours.
- Exhale and push your right leg behind you as shown in the picture and extend your left hand in front. Look down and keep your head in a straight line with your arms. Hold for several breaths.
- Inhale and come back to the starting position.
Repeat on the other side for two more cycles.
The Bow Pose
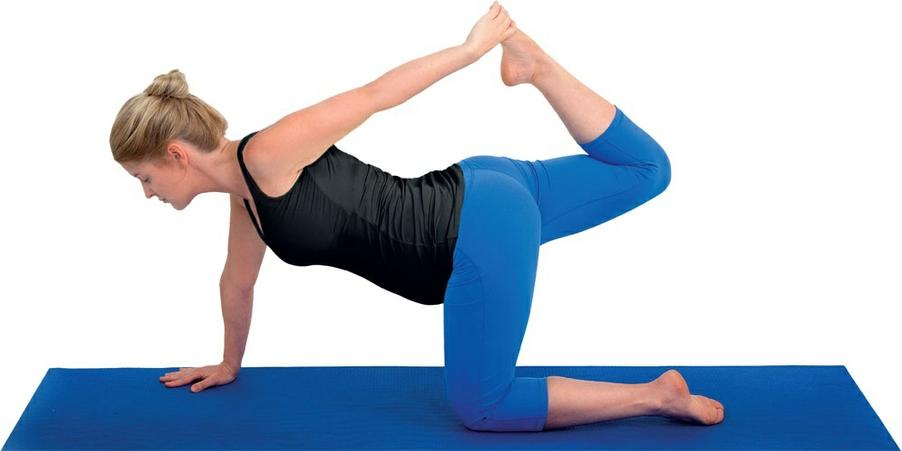
As your baby bump grows in size in the second trimester, there will more pressure on the front part of your body. The Bow pose helps you to counteract the physical effects of this. Do remember that this pose involves both strength and balance. So you should only practise this pose if you are feeling stable and comfortable.
- Come into table top position on all fours.
- Walk your knees together. Fix your gaze ahead of you.
- Simply follow the picture below. Remember to grasp your right leg with your left hand and vice versa.
- Hold each side for several breaths and release slowly.
- Repeat on both sides and practice 3 cycles.
Pigeon Pose
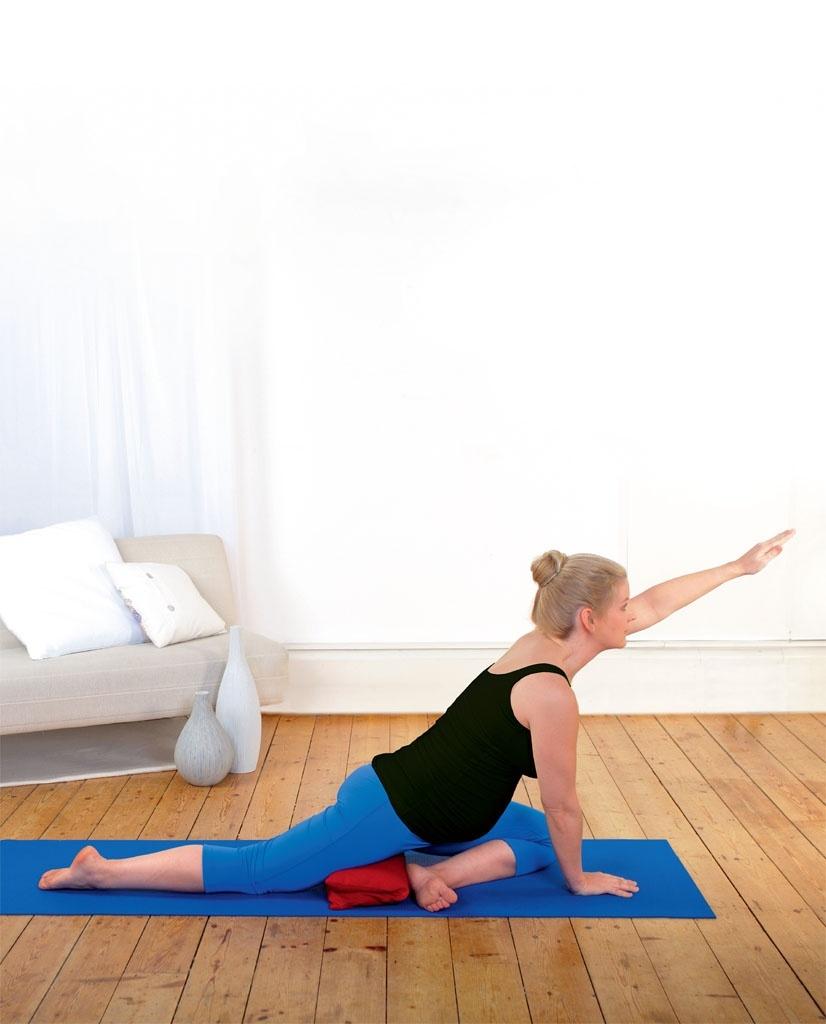
The Pigeon Pose is a kneeling pose that helps you to achieve a slow and deep expansion of the pelvic, hip, buttocks and lower back. You should always practise this pose in a relaxed manner. This pose can also help those suffering from sciatica.
- Come into a tabletop position on all fours.
- Inhale and bring your left knee forwards so that it rests on the floor behind your left wrist and your heel is in front of your right hip.
- Exhale and slide your right leg along the floor until you feel a stretch in your hips. If your hips are feeling stiff, keep your weight supported by both hands.
- Inhale and lift your chest upwards a little to increase the sense of opening up of your front body so that your back muscles are toned.
- Exhale and then inhale and raise your left arm upwards and feel the stretch through your entire body. Hold for a few comfortable breaths and then release.
Repeat it on the other side.
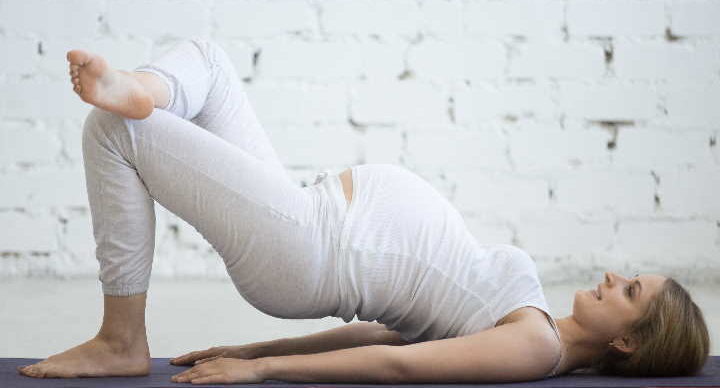
Reclining Twist 2
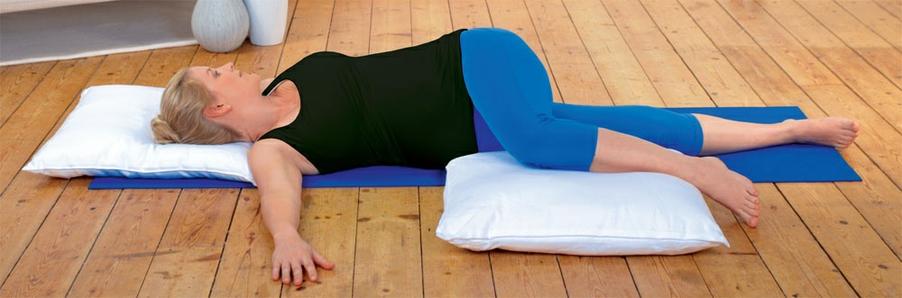
The one leg twist is a progression from the double leg twist and helps you open up your body more from the core.
- Lie down on your back with pillows and cushions behind your back and head if required.
- Keep your legs straight and feet apart. Keep your arms to the sides at shoulder level, palms and shoulders down so that your body is stable.
- Exhale and then inhale and raise your left leg upwards, placing your foot on the floor on the outside part of your right knee as shown in the picture.
- Exhale and slowly lower your left knee over to the right and turn your head to the left. Hold for several comfortable breaths.
- Inhale and slowly lift your left knee upwards and release the leg.
Repeat the twist on the other side. Practise this cycle twice.
About Author
 Dhara is a dedicated and highly passionate yoga instructor from Mumbai who trains our clients personally as well as in group classes. Dhara also helps conduct yoga classes and sessions for kids (Age groups 5-9 and 9-14) which include Asanas, meditation, breathing, basic and simple yogic concepts to help them grow into beautiful adults. Dhara is also an avid practitioner of Reiki, The Art of Living & Vipasana Meditation apart from Crystal Healing & Meditation techniques and incorporates all of her multifaceted skills into her yoga classes and sessions as and when required. And she also takes time out to write for the Wellintra Fitness Blog whenever she can!
Do not miss a single article!
Submit your email id to get new articles directly into your email inbox!

- Zumba Dance Fitness at Byjus - February 25, 2020
- History of Corporate Wellness Programs - February 18, 2020
- Yoga at a Conference - December 11, 2019

Add Review